Handlebars, wheelbrace and rawl bolt
Our April workshop was held in Craughwell with Kevin Walsh. Sixteen fellow woodturners and enthusiasts turned out for the evening.
Kevin started out by sketching his intentions for the evening on a whiteboard. Ash was chosen for the material, the goal was a bud vase and away he went.
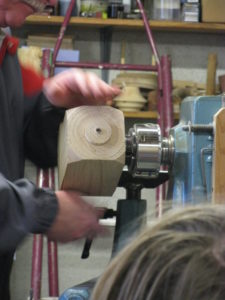
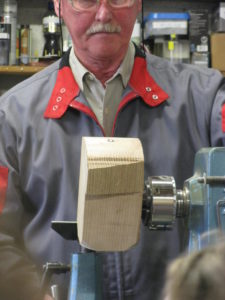
The evening was full of tips and well thought out processes. He put a piece of Ash on the lathe mounted off centre on a screw chuck with the end grain facing him meaning the chisel would only be hitting the wood on one end. The piece was approximately 125x125x300mm approximately.
Tip 1. Kevin left a little extra wood on the end/side the chisel was cutting away from as it being end grain, tear out is inevitable. This will be turned away later when the piece gets mounted between centres.
As he was creating a concave shape on the end grain. Getting a good finish of the chisel is very difficult. But…..
Tip 2. Kevin had a homemade tool rest made from the wheel brace of an old ford escort that had a steep angle that allowed him to lower the tool handle enough to use a sheer cut to level things out safely.
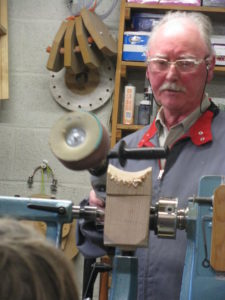
This was then sanded using a Piranha sanding arbor which is a 135mm padded foam sanding drill attachment with a belt of sandpaper about 60mm wide attached to it. It is a safe method of sanding as the wood is turning off centre. You cannot do this by hand while the piece is spinning.
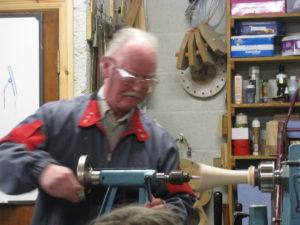
The piece was then moved to between centres held with a spigot . Kevin used a roughing gouge to create a concave shape. The shape to a degree is determined by the depth of the hole used by the screw chuck in the initial stages of the project.
The top of the vase is turned until no flats remain at the high points. A finer gouge is used to prevent damaging the wings at the top as they are delicate at this point. The gouge used here is a ‘continental spindle gouge’. Kevin took relaxed, clean continuous cuts showing fantastic tool control.
With the shape complete Kevin drilled a 3/4“ hole in the top to receive the glass tube that was going to be fitted into the piece using a saw tooth bit.
Tip 3. Applying some candle wax to the drill bit reduces the friction of the bit as it goes further into the wood.
The hole was drilled slightly longer than the length of the glass tube to allow for the collar/flare on the tube to be recessed into the wood at the top. He used a small scraper to create this recess giving great attention to detail that would show in the finished piece. Before the piece was removed from the jaws for the next stage.
Tip 4. Kevin then marked jaw number 1 on the piece in case it had to be remounted at a later stage.
After the piece was off the lathe, the challenge for Kevin was how to hold the piece on the lathe in order to be able to finish the bottom while only having a 3/4“ hole to play with. In a practice piece he used a dowel the same size as the hole as a jam chuck. It worked for turning the end but when finished it was difficult if not impossible to take the jam chuck out without damaging the vase.
The challenge was to come up with a safe way to hold the piece and allow it to be released with ease after completion. His first idea was to use a wedge system similar to that used on the handlebars of a bicycle to tighten them in place. He had made it from wood and tried it but unfortunately it did not work as it made the piece run untrue.
His second idea was to create a rawl bolt effect using a long 6mm threaded bar through the headstock of the lathe. He started by turning a dowel from a piece of ash, drilling a 8mm hole about 75mm deep I think. The remaining wall thickness was only about 1.5mm thick. Kevin then cut the piece along the X and Y axis with a hacksaw which would allow the wood to spread as force was applied. He had made a separate conical shaped piece with a 6mm threaded insert fitted into it. This was screwed onto the threaded bar spreading the dowel shape piece out to give a good hold on the vase. He used a spanner to tighten it at the headstock. The system gripped evenly along the vase as Kevin had tapered the dowel shaped piece to compensate for the spread as the conical shaped piece tightened. From here he was able to finish the vase on the bottom and add a couple if V cuts using a point tool.
Tip.6 Use a small piece of leather at the top of the vase where it meets the rawl bolt jig to prevent any damage.
Just before we broke for tea Kevin took out a piece he had being working on earlier. He had spirit stained it a blue/navy colour with a red band near the bottom and wanted to show us how to apply gold leaf for decoration. He applied ‘size’ to the red band which is a liquid used to apply gold leaf. It needs to applied about 20min before you put on the gold leaf but it can be left much longer as it has a very long open time.
After the break Kevin showed us some sheets of gold leaf he picked up in a craft shop in London. They were 23 3/4c gold sheets. The amount of carrots determine the colour as well as the purity and Kevin felt this particular one had a warm tint to it. This is also the reason the band was painted red prior to applying the gold, it gives the finish a warmer colour and helps stop the ‘size’ from soaking into the wood.
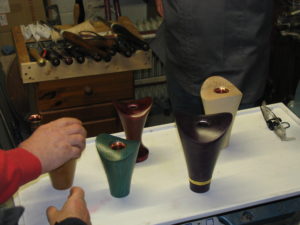
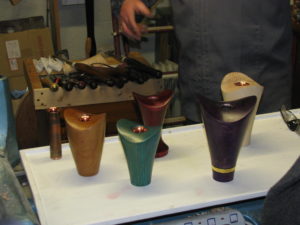
Kevin then took out several beautiful examples of the vase in all shapes, sizes, woods and colours. He had made a copper tube insert for some of the pieces using 1“ copper pipe with a soldered disk on the bottom and he had flared the top by heating the copper then using a ball peen hammer to give the desired shape. This was then sanded to a high polish and treated with Ryland Brass Lacquer to preserve the shine.
A sincere thanks to Kevin and his wife Margaret for a fascinating and entertaining evening enjoyed by all.
Declan Horan
Leave a Reply